Thursday 29 September 2016

Homemade Bone Broth for Health Benefits


Making bone broth has been done for many years, it is a way to make the most of leftover bones from cooking and more importantly it is an easy, inexpensive and accessible source of vital nutrients. Bone broth is great for skin, hair, nails and joints, it provides several essential amino acids to the body, it is a remedy for illness and boosting the immune system, as well as improving allergy symptoms, and it is very supportive for digestion and gut health. 

Bone broth can be used as a base for soups and stews or gravy and sauces, it can be added to cook veggies for extra nutrients or warmed in a mug to drink on a cold day.

Bone broth is very easy to make and will be better than store bought alternatives because you control exactly what goes into it! Follow the directions below to create your own nutritious bone broth!

Ingredients

  • Poultry or beef bones from leftovers or raw bones from a butcher - try to make sure the bones come from healthy sources that are either grass fed or organic
  • Enough water to cover your bones
  • 2 TBSP apple cider vinegar
  • 1 onion
  • 2-3 carrots
  • 2-3 stalks celery
  • Spices and herbs- parsley, salt, peppercorns, garlic, any other of your favourite spices
  • Slow cooker
Instructions
  • Gather the bones
  • If the bones are raw, roast them for 30-45 mins at 350 degrees
  • Place the bones in a slow cooker and cover with cool water then add the apple cider vinegar, allow to sit for 20-30 minutes to help the nutrients in the bones to become more available
  • Chop the vegetables and add them plus salt, pepper and spices or herbs to the slow cooker

  • Turn the slow cooker to low and let sit for 14 hours
  • Once time is up, CAREFULLY pour the liquid through a fine mesh strainer into a bowl to remove any little bits of meat, bone, vegetables, or spices

  • You can use some immediately to make a delicious soup by adding shredded chicken, sliced carrots, celery, onion and kale
  • Freeze the remainder in mason jars to use later as the weather starts to cool and the flu comes your way


As the weather gets colder outside this is a great way to warm up with a cup of broth or to make variety of different soups that are good for the body and soul!

Tuesday 13 September 2016

One of my favourite fall treats is pumpkin donuts! They smell heavenly when they are baking in the oven, that’s right they are baked not fried (shocker I know).

If you have 2 bowls and 10 minutes you can make these scrumptious treats, no problem. I suggest brewing yourself a coffee or tea while they cook for 12 minutes and you are done. These guilt free and gluten free donuts will not disappoint.

Are you ready for an easy and delicious fall donut ? Ok, here you go!

Gluten Free Pumpkin Chai Donuts

Ingredients
  • 2 cups gluten free flour 
  • 2 tsp baking powder 
  • 2 tsp cinnamon
  • 1 tsp allspice 
  • ½ tsp ginger 
  • ½ tsp sea salt 
  • ¼ tsp cardamom 
  • 1½ cup pumpkin 
  • ½ cup maple syrup 
  • ¼ cup unsweetened applesauce
  • 2 eggs
Instructions

1.      Preheat oven to 350.
2.      In one bowl , add the dry ingredients.
3.      In another bowl , mix the wet.
4.      Add dry to wet and mix until combined.
5.      Spoon batter into greased donut pan.
6.      Bake for 10-12 minutes (until a toothpick comes out clean).
7.      Let cool completely before removing from the pan. 
8.      Store in an airtight container in the fridge. They should last a couple weeks that way.
9.       You can also freeze them for up to 6 months.

Makes approximately 12 donuts

reference mywholefoodlife.com

If you want to be a little creative with toppings you can certainly do so. Maybe you want to keep it easy and sprinkle some additional spices to the top
or maybe you want to having a healthy ‘icing’ topping. Like this one, which I will be trying next time,

Maple Frosting
  • ·         3/4 cup cashews soaked in boiling water for at least 2 hours (I like to start soaking the cashews the night before so it's ready for the next day)
  • ·         3 tablespoons maple syrup (or honey)
  • ·         1 teaspoon pumpkin pie spice
  • ·         1 teaspoon vanilla extract
  • ·         1 teaspoon lemon juice
  • ·         3 tablespoons coconut oil, melted
For the frosting
Drain the water from the cashews that have been soaking for at least 2 hours and place the cashews in a blender or food process with all of the other frosting ingredients and blend until smooth.
Icing reference: www.asaucykitchen.com

Enjoy 


Thursday 8 September 2016

Easy Homemade Larabars

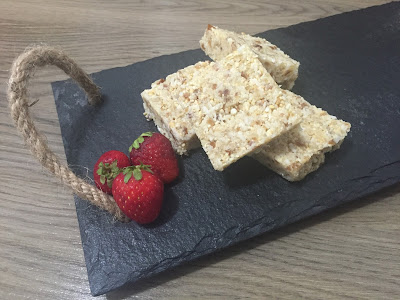
Looking for a new snack to pack in the kids lunch? Need an easy and healthy snack on the go? Homemade Larabars are a great alternative to expensive protein bars or sugar-packed granola bars. With a few simple ingredients and a food processor you can have these Pineapple Coconut Cake Larabars ready to go in minutes. Check out the recipe below!

Ingredients


  • 1½ cups raw cashews
  • 1 cup unsweetened shredded coconut
  • ½ cup dried pineapple
  • 8 medjool dates
  • 2 T coconut oil
  • Juice of 1 lime


  • Instructions

    1. In a food processor, grind up the cashews for a minute. Then add in the remaining ingredients and mix until a dough forms.
    2. Line an 8x8 glass baking dish with parchment paper. Using a spatula press the dough into the baking dish. If you prefer, you can roll these into bite sized balls and place on a lined baking sheet.
    3. Once the dough is in the baking dish, transfer it to the fridge to set. It should not take long at all.
    4. Once the bars are firm, use a pizza cutter to cut into bars. Keep these bars stored in the fridge. They should last several weeks that way. You can also freeze them for much longer. Enjoy!